
Page History
...
| Section | |||||||||||||||||||||
|---|---|---|---|---|---|---|---|---|---|---|---|---|---|---|---|---|---|---|---|---|---|
|
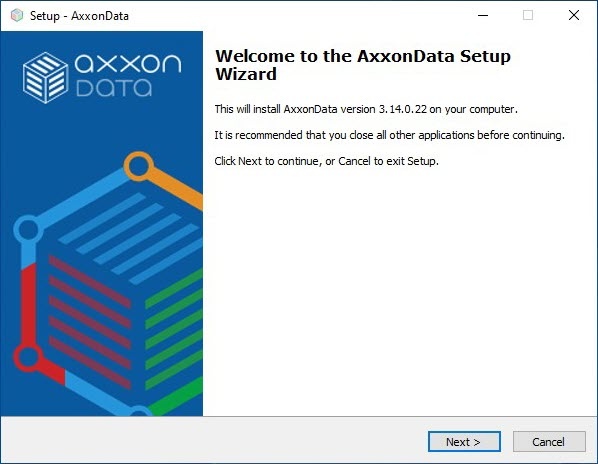
AxxonData is a local version of the AxxonNet cloud service and it is used to work in local networks only. AxxonData is compatible with Axxon One version 1.0.4 and with the Axxon Next archive product.
| Tip |
|---|
Minimum requirements for installing and running AxxonData |
Installation of AxxonData
| Note | ||
|---|---|---|
| ||
|
To install AxxonData, do the following:
- Download the distribution kit using the link.
- Run the AxxonData installer as an
- Administrator.
- Select the installation language and click OK .
- :

- Click Next .
- :
- Select the installation directory and click
- directory:
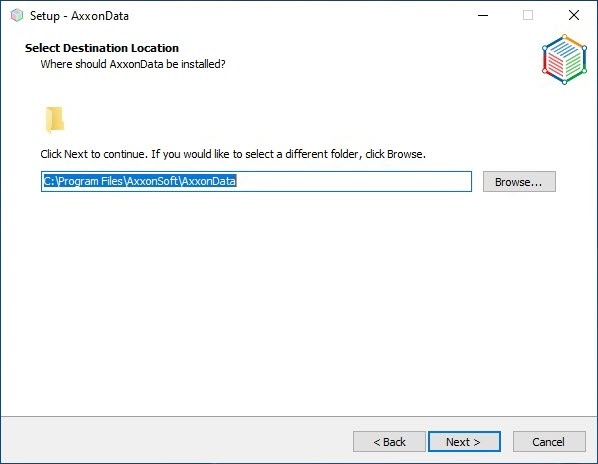
- Click Next.
Select the access protocol for local cloud:
HTTPS
—a standard AxxonData installation —a standard AxxonData installation will be performed using a certificate on port 443.
Note title Attention! If you install AxxonData using the HTTPS access protocol, then it won't be possible to update it to HTTP later.
HTTP
—a standard AxxonData —a standard AxxonData installation will be performed without encryption
using port 80using port 8082.
Note title Attention! If the version of AxxonData is lower than 3.15, the default installation is performed on port 80 when you use the HTTP access protocol. In this case, to web
access access AxxonData
and and add Servers to it, you must open port 80 from Client devices or from the connected Axxon One
ServerServer. If port 80 is busy (for example, if the Axxon One
Server Server is running at the time of installation), you will be prompted to use port 8082.

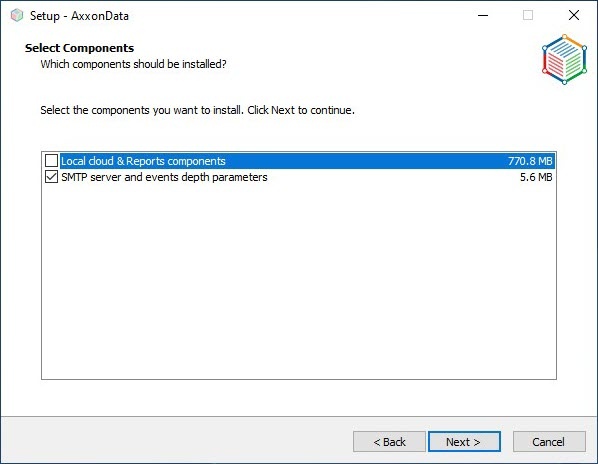
- Click Next. A window with a selection of components to install opens:

- Set the checkboxes next to the components that you want to install. We recommend installing all components.
- Click Next.
- Select the folder from the Start menu. By default, it is AxxonData:
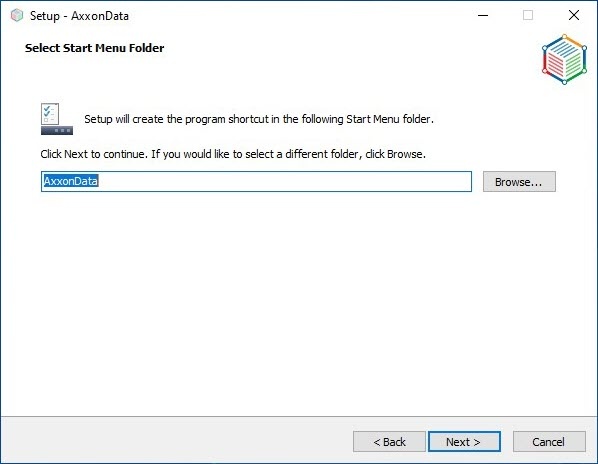
- Click Next.
- Click Install:

AxxonData installation starts on your computer:
- To send email notifications, specify the SMTP server parameters. If you don't want to send notifications, you can skip this step.
- click Next.
To set up an SMTP server, do the following:- In the Server address field, enter the SMTP server for outgoing mail.
- In the Server address field, enter the SMTP server for outgoing mail.
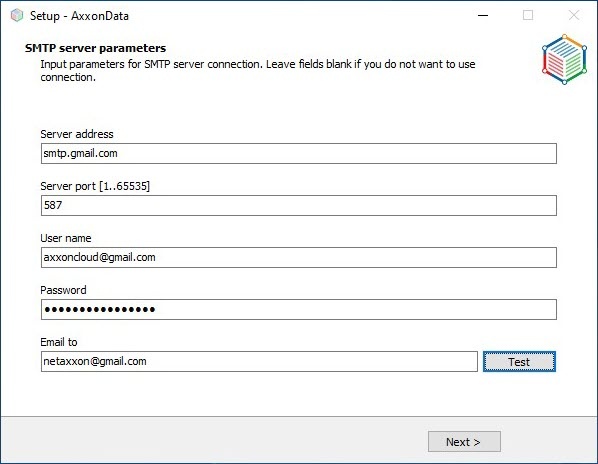
- In the Server port [1..65535] field, enter the port number used by the SMTP server for outgoing mail.
- In the User name field, enter the full email of the account used to send messages on the SMTP server for outgoing mail.
- In the Password field, enter the 16-character code without spaces generated when configuring the SMTP server for outgoing mail.
- In the Email to field, enter the email of the account to which a message will be sent about the correctness of the entered SMTP server parameters.
- Click the Test button.
Note title Attention! A message will be displayed if you specified the parameters of the SMTP server:
- Correctly: Test message is successfully sent. Please check your email.
- Incorrectly: An error occurred while sending the test message. Please check the parameters to connect to the SMTP Server.
- Click Next.
- Click Next.
- Click Install.
AxxonData installation will start on your computer: - Enter the depth of event storage in days. By default, it is 60 days:
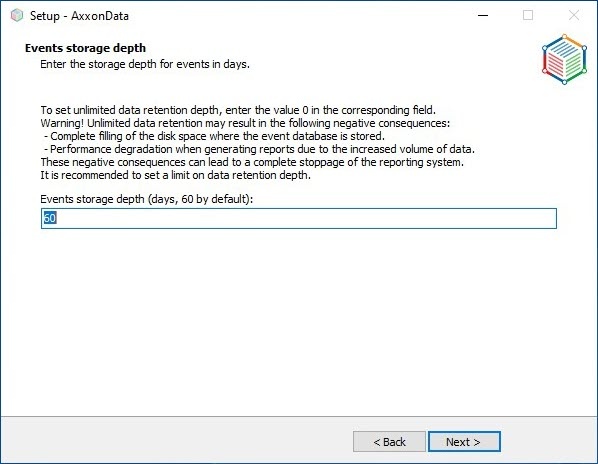
- Click Next.
- Click Finish and restart the computer .
- :
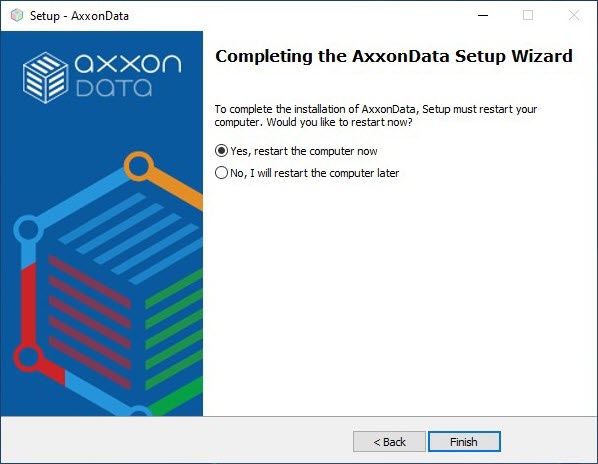
Installation of AxxonData is complete. After installation, the AxxonData shortcut will be created on the desktop. Installation logs will be available in the C:\Users\User\AppData\Local\Temp folder, the product logs will be available in the C:\ProgramData\AxxonSoft\AxxonData and C:\ProgramData\AxxonSoft\AxxonNet folder.
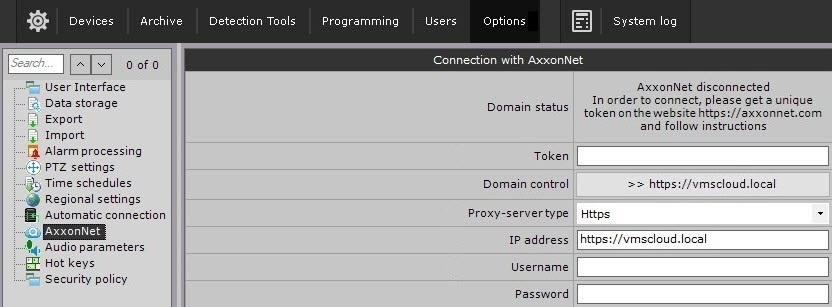
AxxonData will be available at:
| Connection protocol | Address |
|---|---|
| HTTPS | https://vmscloud.local |
| HTTP | http://vmscloud.local |
By default, two test users are available:
- USER NAME OR EMAIL—Admin1
- —Admin1, PASSWORD —admin1password
- —admin1password.
- USER NAME OR EMAIL—Admin2
- —Admin2, PASSWORD —admin2password
- —admin2password.
These users can create other users, including the administrators. Names of users are case insensitive.
Configuring the local Client Client installation type
To configure the local Client installation type
...
Perform the configuration as follows, do the following:
- On the computer on which the Axxon One Server is installed, specify the cloud address with the protocol.
- Start the Server.
- Follow these steps for all Servers of Axxon-domain.
- On computers without AxxonData installed, from which you need to connect to it:
In the hosts file (located at C:\Windows\System32\drivers\etc), set the IP address of the computer on which AxxonData is installed.
Info title Note The hosts file must be readable and writable.
- Add the rootCA.pem certificate from the AxxonData installation directory to the trusted root certification authorities.
Code Block certutil –addstore -enterprise –f “Root” c:\rootCA.pem - Configure security policies:
- Run the Local Group Policy Editor:
Code Block WIN+R → gpedit.msc - Select Windows Settings → Security Settings → Public Key Policies → Certificate Path Validation Settings.
- Run the Local Group Policy Editor:
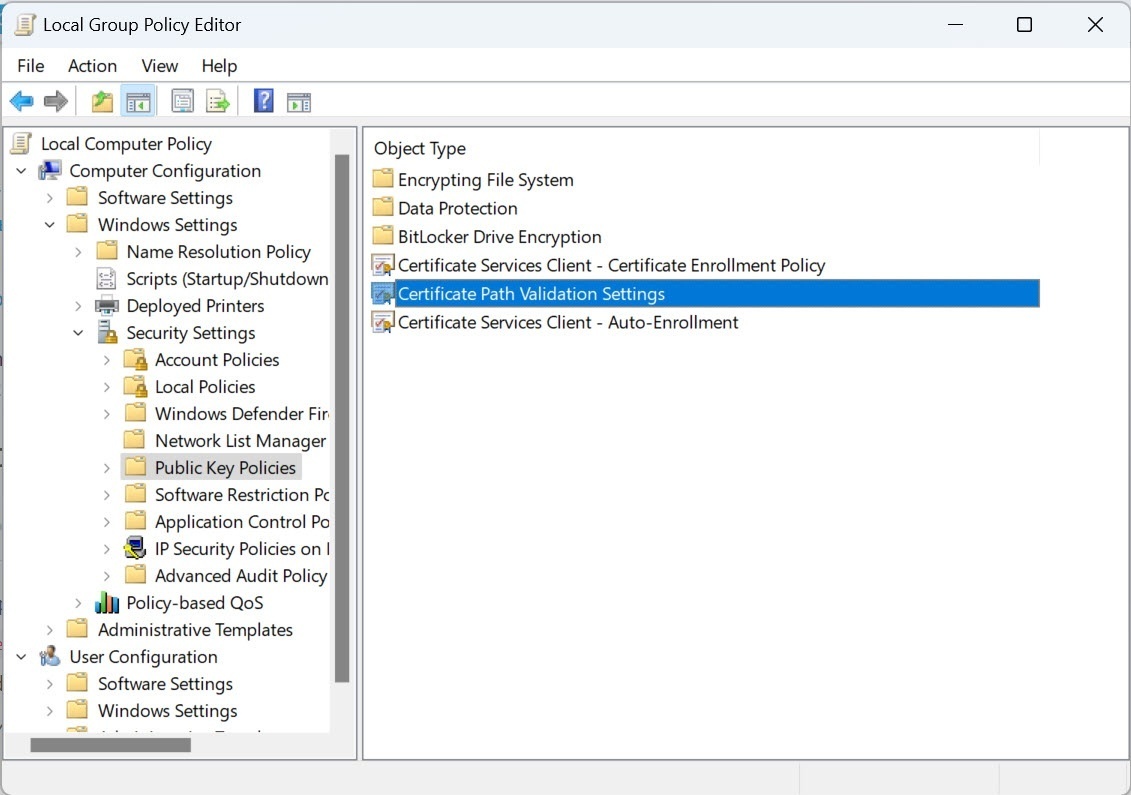
- Set the settings checkboxes in the Per user certificate stores section, and the Define these policy settings checkbox.
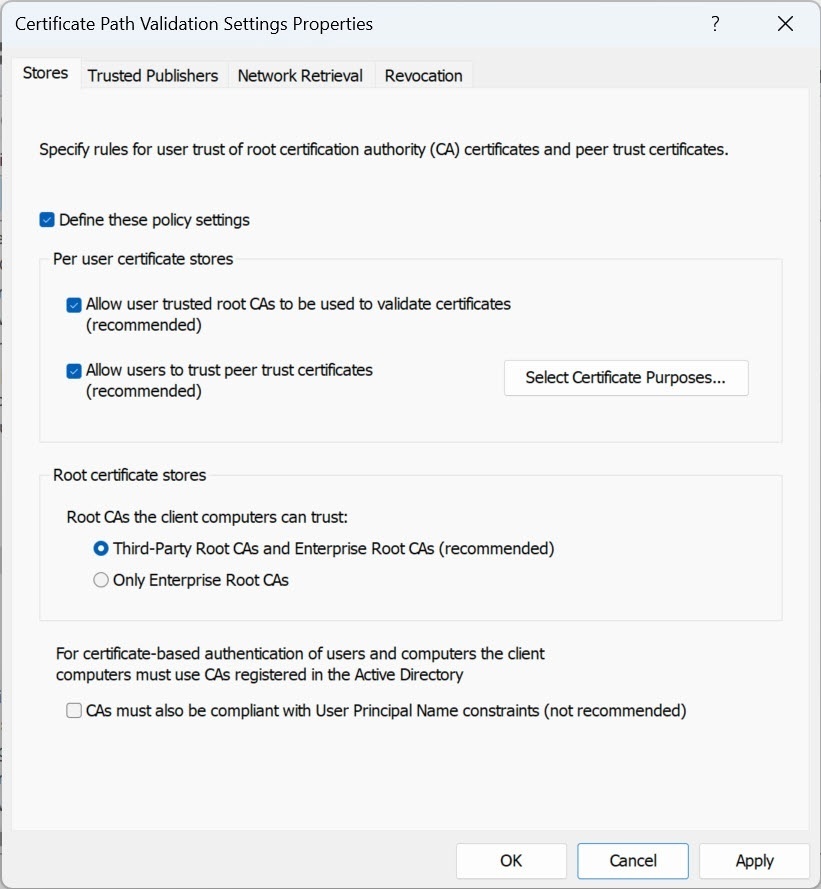
- Click Apply.
- Restart the computer.
Configuration of the local Client installation type is complete.
Updating AxxonData
To update AxxonData, do the following:
- Download the distribution kit of a new version of AxxonData using the link.
Note title Attention! When you update from AxxonData 3.25, you need to move files from the folder C:\ProgramData\AxxonSoft\AxxonData\backup to the folder C:\ProgramData\AxxonSoft\AxxonData\images.
- Run the installer of a new version of AxxonData as Administrator. You don't need to uninstall the previous version.
- Perform the installation. The steps repeat the installation procedure (see Installation of AxxonData).
- Set the checkboxes next to the components that you want to install:
- If you want to update only AxxonData and PostgreSQL 10:
- Set the Local cloud & Reports components checkbox.
- Click Next.
- In the window that opens, click Yes:
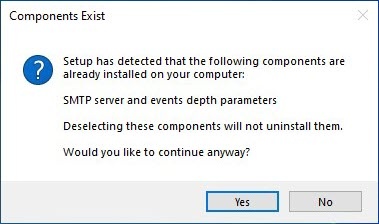
A window opens to confirm the installation of the selected components of AxxonData: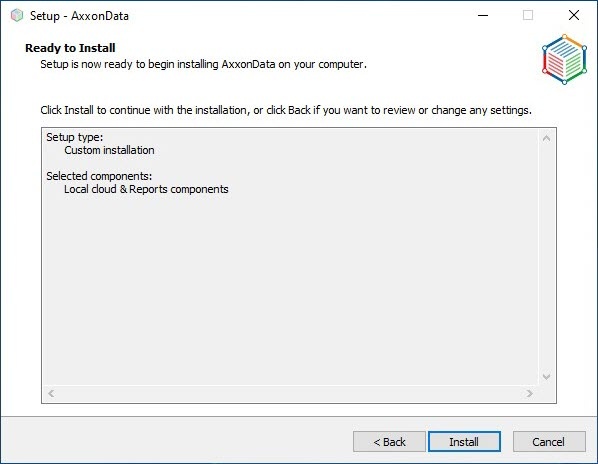
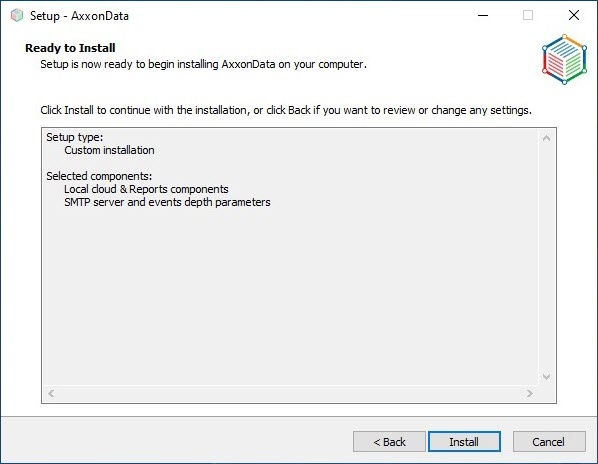
- If necessary, update the parameters of the SMTP server and depth of event storage:
- Set the SMTP server and events depth parameters checkbox.
- Click Next.
- If you want to update only AxxonData and PostgreSQL 10:
- Click Install:
Installation of AxxonData and PostgreSQL 10 starts. - Update the SMTP server parameters (see Updating the parameters of the SMTP server).
- Click Next.
- Update the depth of event storage in days. By default, it is 60 days.
- Click Next.
- Click Finish and restart the computer.
Updating AxxonData is complete.
Updating the parameters of the SMTP server
To update the parameters of the SMTP server, do the following:
- Run the AxxonData installer as Administrator.
- Perform the installation. The steps repeat the installation procedure (see Installation of AxxonData).
- Set the SMTP server and events depth parameters checkbox:
- Click Next.
- In the window that opens, click Yes:

- Click Install.
- Specify the SMTP server parameters:
- In the Server address field, enter the SMTP server for outgoing mail.
- In the Server port [1..65535] field, enter the port number used by the SMTP server for outgoing mail.
- In the User name field, enter the full email of the account used to send messages on the SMTP server for outgoing mail.
- In the Password field, enter the 16-character code without spaces generated when configuring the SMTP server for outgoing mail.
- In the Email to field, enter the email of the account to which a message will be sent about the correctness of the entered SMTP server parameters.
- Click the Test button.
Note title Attention! A message will be displayed if you specified the parameters of the SMTP server:
- Correctly: Test message is successfully sent. Please check your email.
- Incorrectly: An error occurred while sending the test message. Please check the parameters to connect to the SMTP Server.
- In the Server address field, enter the SMTP server for outgoing mail.
- Click Next.
- Click Next
- Click Finish and restart the computer.
Updating the parameters of the SMTP server is complete.
Deleting AxxonData
To delete AxxonData, do the following:
- Go to Start → Control Panel →Programs and Features.
- In the list of installed programs, find AxxonData and right-click it.
- In the context menu, select Uninstall.
- In the window that opens, click Yes. The process of uninstalling AxxonData starts.
- In the window that opens, click OK.
- In the list of installed programs, find PostgreSQL 10 and right-click it.
- In the context menu, select Uninstall/Change.
- In the window that opens, set the Entire application checkbox and click Next. The process of uninstalling PostgreSQL 10 starts.
- In the window that opens, click OK.
- Delete the C:\Program Files\AxxonSoft\AxxonData\pg folder.
- Delete the C:\Program Files\AxxonSoft\ AxxonData folder
- AxxonData folder.
- If you cannot delete the C:\Program Files\AxxonSoft\AxxonData\pg and C:\Program Files\AxxonSoft\AxxonData folders, then:
- Go to Start → Task Manager → Processes.
- Make sure that AxxonData, nginx, and nats-streaming-server processes aren't present, otherwise delete them.
- Go to Start → Task Manager → Services.
- Make sure that AxxonData, Reports, nats-streaming-server, postgresql-10-ac
and - and exporter
processes - processes aren't present, otherwise delete them.
- Open a command line as administrator.
- Enter the commands to delete the services one by one:
Code Block sc delete axxondataCode Block sc delete reportsCode Block sc delete nats-streaming-serverCode Block sc delete postgresql-10-acCode Block sc delete exporter
- processes aren't present, otherwise delete them.
- After deleting all dependencies in processes and services, you must delete the C:\Program Files\AxxonSoft\AxxonData folder manually.
- Restart the computer.
AxxonData is deleted.
Reports
...
.